August 4, 2017
3 Ways to use the Treadmill for Strength Training
The treadmill may be the most popular piece of cardio equipment in the gym. It’s used by fitness beginners, marathon trainers, lifters, walkers and triathletes alike. As far as operating it goes, it’s not terribly mysterious either. Walk up, push start, choose your speed and you’re off. It’s such a staple of indoor fitness, it’s hardly thrilling any more.
So if you are starting to feel a little ho-hum or a little bored with the average treadmill workout, we are shaking things up. Forget cardio for now – let’s try strength training with it. Changing up the speed (or turning it off entirely) as well as your position on the machine (while remaining safe) takes the treadmill into new territory. MIT Recreation Personal Trainer Danae Olmedo has put together the following three ways to use the treadmill for strength training. You may never think of this steady gym staple the same way again!
TREAD PUSH (45 sec)
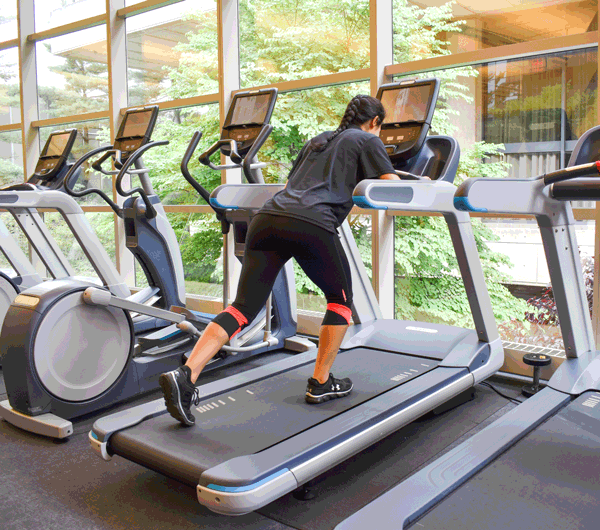
As the name suggests, “Tread push” is meant to mimic a sled push. This is a great way to challenge the large posterior leg muscles to produce stronger contractions as well as develop core stability. Detail of major importance: LEAVE THE TREADMILL OFF! The goal here is to generate enough force to push the belt into motion. Holding the handles nice and tight using the upper extremities, push the belt in the direction it typically moves with alternating steps.
*Form and safety tips:
1) No cheating! Resist twisting/wiggling your torso to get through the movement; the integrity of your lower back will be compromised. Think about maintaining the shape of the letter ‘I’ with your shoulders, spine and hips – shoulders and hips should be parallel to each other with a long neutral spine between them.
2) Brace yourself! Keep everything north of the hips steady; this means finding solid, slip-resistant hand (or arm) rests that suit your height in order to protect your shoulders. Arms do not need to be fully extended with elbows locked out. Taller individuals will likely need to grip the outer edges of the water bottle holders (if you are using the MIT Recreation treadmills) on either side of the center console. The most important thing is to have upper extremities no higher than the shoulders by the time you start pushing.
3) Glutes, glutes, glutes! Keep everything south of the hips moving by activating the glutes instead of the quads. Slow and steady wins the race here, and the knees shouldn’t straighten all the way out on each step. Your heel should come in contact with the belt at the beginning of each step and only push back far enough to support your body weight while the other leg begins the next step. Keeping the knee bent during the push will help to reduce the amount of quad use and give your hamstrings and glutes some time in the spotlight.
*Variation:
-Sometimes one glute engages in this movement better than the other; in this case, single leg extensions can be a good way to identify unilateral (one-sided) weaknesses or poor muscle recruitment patterns and provide a means to strengthen each side on its own. Instead of keeping both feet on the belt, plant one foot on the stationary plastic strip next to the belt and perform the same push repeatedly with the other leg. Go for sets of 8-12 pushes per leg at varying paces (turtle crawl, rollerblade glide, explosive start, etc.) to identify your problem area, then try a few sets at that speed to improve it!
*Progressions:
-Once you’ve found your stride and established how to safely push the belt from a stop, add the tiniest bit of resistance by (believe it or not) turning the treadmill ON. Select ‘Quick Start’ and set the speed to 0.5. Chances are, you will be accustomed to pushing the belt faster than this so it will feel like resistance if you continue generating the same amount of force. This progression can be implemented for the full tread push or the single leg extension.
-Tread push sprints are another great way to increase the intensity of this exercise once you’re familiar with how it’s done. By definition, this sprint should only last about 5-10 seconds at your top speed before you inevitably slow down – if it lasts any longer than that, it wasn’t a sprint for you.
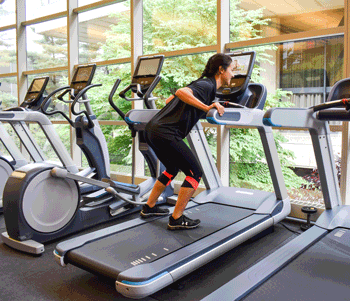
REVERSE TREAD PUSH (45 sec)
In the words of DJ Casper, “Reverse, reverse!” With the machine still off and your back to the control panel, hang on to the treadmill arms as you sit low and push the belt out in front of you as if you are walking backwards. This will work the quads and core if your shoulders and hips hold that same ‘I’ frame without twisting.
*Form and safety tips:
1) No cheating! Same idea as above – resist twisting/wiggling and maintain the ‘I’ frame.
2) Brace yourself! This exercise cannot be performed without upper body bracing, so make sure you find a sturdy hold that is comfortable for your elbows and shoulders.
3) Stay on track! Don’t let your knees buckle toward each other – the long bones of your legs should be aligned like train tracks. In other words, keep your shin in line with your thigh when you extend your leg. This will help to protect your knee joint and ensure that the quad muscles pull the patella within its designed groove.
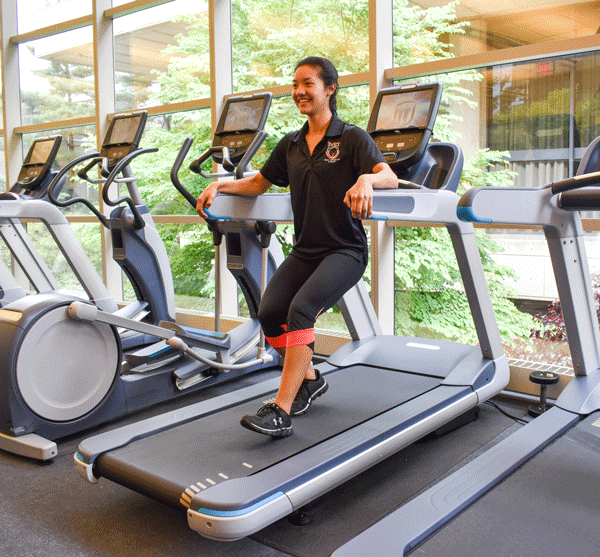
LATERAL SHUFFLE (45 sec/side)
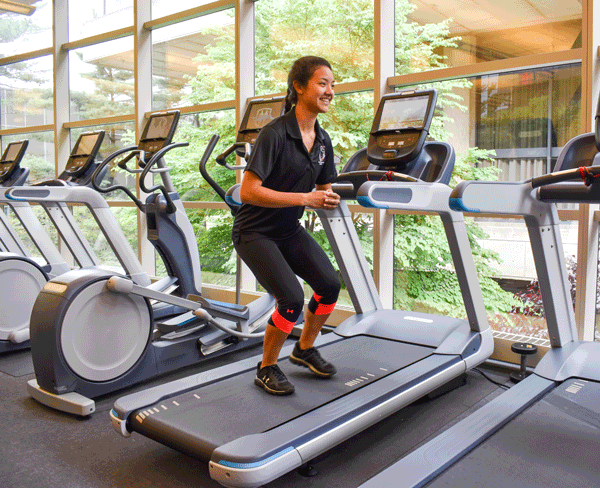
Whether you play sports or not, assuming a defensive athletic position recruits muscles and even senses that are designed to work together. While challenging your sense of balance in this plane of movement, the core must constantly adjust in order to stabilize the torso while you sidestep. Keep those hips and knees slightly bent, and select ‘Quick Start’ to get the belt moving at a steady slow speed. Hold the arm of the treadmill for balance if needed.
*Form and safety tips:
1) No cheating! Resist leaning/arching your back to get through the movement – the integrity of your lower back will be compromised here, too. Keep thinking about making the shape of the letter H with your shoulders, spine and hips; shoulders and hips form a solid square, with the spine straight and stable between them.
2) Brace yourself! If you’re having a tough time balancing or shuffling in a straight line, hold onto the arm of the treadmill.
3) Watch your step! Don’t cross the trailing foot over the lead foot – it’s a shuffle, not karaoke.
*Progression:
-Once you’ve got the shuffling down, try putting a resistance band around your knees to strengthen your hip abductors. Adjust the speed to something manageable when you add this resistance!
Ready to try these moves out?
We have three fitness floors and of course, plenty of treadmills at MIT Recreation; two floors at our Zesiger facility, and one floor at our Alumni/Wang facility (located next to the Stata Center). Not a member? No problem. Grab a Day Pass or check out our membership options. We hope to see you in the gym soon!
BACK TO ALL
Comments
The comments are closed.
There aren't currently any comments on this blog entry.